Total Pageviews

Monday, June 30, 2014

Total 3-Day Detox

"Let food be thy medicine and medicine thy food." -Hippocrates 

Every few months it's important to take a few days and cleanse your mind and body. We all need it!  Toxins are everywhere... they are in the air we breathe, the food we eat, cleaning products we use... the list goes on and on.  Stress, anxiety, & negativity, also release toxins within our bodies.  It's impossible to live toxin-free, that is why it is so important to take the time to detox.  Every few months I like to follow these seven steps in order to detox my mind & body.  The length of my detox always varies.  It can be as short as 3 days or as long as 7.  You can make it however long you would like but if you are new to juicing I would recommend starting off slow!


Things to avoid while detoxing: 

Solid Foods 
Coffee 
Sodas 
Bottled Drinks 
Alcohol 
Gum 
Smoking 

What to Take in while Detoxing: 

Fresh Juices without pulp 
Water 
Detox Tea 
Hot Lemon Water 


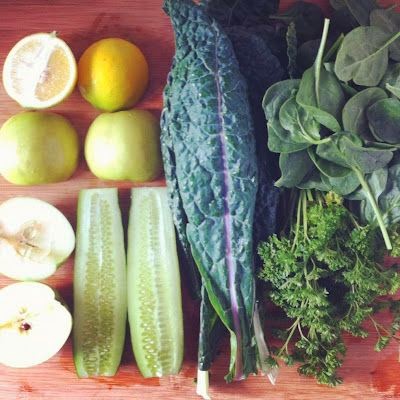
Step One:  Prepare for a Juice Detox.  Try and purchase organic produce while detoxing.  It will help aid the entire process.  I typically drink 6 16oz fresh juices a day during a detox.  I make all of my juices with a Breville Juicer (Not a smoothie maker) and I store the juice in mason jars.   


Step Two: Drink lots and lots of Hot Lemon Water.  There are so many amazing benefits to drinking hot lemon water especially while detoxing! Here are Few of them: 


  • Aids Digestion 
  • Better than Coffee
  • Clearer Skin 
  • Weight loss Aid 
  • Natural Diuretic 
  • Balances PH levels 
  • Boots Immune System 
  • Helps purify and Stimulate the Liver 
  • Flushes Unwanted Materials
  • During a juice detox, lemon water helps dissolve mucus and toxins from our cellular tissue!!!


Step 3:  Drink two cups of Detox tea a day when detoxing.  I prefer the Yogi tea... You can purchase it at almost every grocery store.  This tea is fantastic! Perfect for when you've had too much of a good thing over the weekend.  I especially love drinking it when I'm detoxing.


 Step 4:  Take a Detox Bath.  This is personally one of my favorite steps! A friend of mind by the name of Kylie turned me onto this detox bath recipe and I ALWAYS incorporate into my detox process now. Make a relaxing playlist, light some candles, add some rose pedals and enjoy! Go all out... You deserve it!

  • Set aside 40 minutes of your day for your bath (The first 20 minutes are for detoxing, the second 20 are for absorbing all of the minerals in the water) 
  • 2 cups of Epsom Salt 
  • 2 or more cups of Baking Soda 
  • 3 pints of Hydrogen Peroxide
  • 2 ounces of Ground Ginger (or Ginger Tea Bags for less of a mess) 
  • Tea Tree Oil ( I recommend using a small amount of Tea Tree Oil.. it can burn if you put too much)  

Step 5:  Take a break from the internet.  This is such an important step and it's so nice to do this every once in awhile! Spend the time you're detoxing, reflecting on things you are most thankful for in life!  


Step 6:  Write down 5 positive affirmations every morning and every night.  Take this time to reflect on your life.  The things you are thankful for, the things you want to succeed in, your goals, and your ambitions.  We are surrounded by so many beautiful blessings and sometimes we get distracted by our never ending to-do lists.  It's easy to take the small things for granted so use this time reflect and most importantly take this time for yourself.  


Step 7:  Relax your mind and meditate.  Spend a little extra time over these next few days praying, and quieting your mind.  Like I said earlier, toxins do not only come from bad food and cleaning products, They also come from stress and anxiety.  Take a hot yoga class, or before bed spend some time in a peaceful room alone reflecting on your life and the things you are most thankful for! It will make all the difference in the world. 


And there you have it! All the necessary step to a successful 3-Day Detox. Hope you all enjoyed this blog!

If you need recipes for your Juice Detox, You can check out my 50+ Juicing Recipes and My Super Green Detox.  


XoXo, 
Ashley

For Daily Tips and Recipes follow me on: 

Instagram: ashleynicolemora1 
Twitter: MissAshleyMoora 


Tuesday, June 10, 2014

Juicing on a Budget


Squeeze the Most Out of Every Dollar! 

There is a little rumor going around that juicing is outrageously expensive.  Can it be pricey? Well, yes of course it can be... but it doesn't have to be! There are ways to squeeze the most out of every dollar when it comes to purchasing produce.  


Here are my 10 tips on how to juice on budget! 
  1. Purchase produce that has a high water content. Fruits and Vegetables that have a high water content tend to produce a lot more juice.  This weekend I juiced 1 medium sized watermelon and it made 6 16oz jars of juice.  Some other items that juice well are cucumbers, celery, apples, pears, and lemons. 
  2. Cut back on the berries.  They don't produce a lot of juice and they are expensive.
  3. Purchase your produce at a farmers market.  You can also save money by buying in bulk at places like Sam's Club or Costco.  They are now starting to offer organic produce. 
  4. Buy produce that is in season. Produce that is in season typically costs less and is usually on sale.
  5. Purchase a mint leaf plant (I got mine at Walmart)  I use a lot of mint leaves in my juices and the containers at the store can be pricey.  
  6. Plan ahead.  It's easy to get excited when you go the grocery store but if you make a list ahead of time and stick to it, you can cut down the cost of your grocery bill.   
  7. Grow Your Own Garden. I by no means have a green thumb but you can save a lot of money growing your own produce.
  8. If your produce is about to go bad, juice it and then throw it in the freezer.  You can preserve the juice for a few weeks in the freezer without it going bad. 
  9. Keep your produce in the refrigerator, it will help preserve the life of your produce. 
  10. Stretch Juice out with sparkling water, coconut water, or ice cubes! It's very tasty and if you like carbonated drinks like diet coke, sparkling water is a great substitution.


 Low Budget Recipes  
 Recipes with minimal ingredients are typically less expenisive.  If you are a new juicer, these might not be the greatest juices to start off with because they are not as tasty as the recipes with a bunch of fruit. Check out my 50+ juicing recipes post for more creative ideas! 

Juice for $1.35 per Glass 
1 Beet, 3 apples, 1 lemon 
Juice for $1.65 per Glass 
15 carrots 
8 Celery Stalks 
2 Apples 
Juice for 1.45 per Glass 
2 1/2 Cups of Kale 
3 Apples 
1 Lemon 
Juice for $1.30 per Glass 
10 Carrots 
2 Apples 
Inch of Ginger Root 
Juice for $1.30 per Glass
1 Beet 
1/4 Watermelon 
Juice for $1.25 per Glass 
2 1/2 cups of Spinach 
3 Apples 
1 Lemon  


*** A Few Things to Keep in Mind***

We invest a lot of our time, money, and energy into things like clothes, shoes, an apartment, maybe a house, a car.... the list goes on and on.  The majority of the time our health is something we put on the back burner because we get so caught up in life.  When you start juicing, consider it an investment for your own health.  Just like with clothes, usually the more expensive the shirt, the better quality it is.  Food works the same way and it is SO important to always remember "benefits over cost" and I truly believe that juicing is one of the best ways to maintaining a healthy lifestyle! 


If you enjoyed this blog you might want to take a little look at "How To Get The Most Out Of Juicing" which will also help with juicing costs and my "50+ Juicing Recipes" blogs. 


Much love, 
Ashley 

For Daily Tips and Recipes follow me on: 

Instagram: ashleynicolemora1 
Twitter: MissAshleyMoora 

Monday, June 2, 2014

How to Store Juice


 Happy Monday and Happy June! It officially feels like summer.. Woo Hoo! 

One of the most frequently asked questions I receive is... "How long can I store my juice?"  Making fresh juice can be extremely time consuming and tedious (especially in the beginning... it gets better the more you do it, I promise) ...  If you are anything like me (busy busy busy) going thru the juicing process everyday is pretty much out of the question.  I simply just don't have the time for it, which is why making juice in advance is a must! 


If you do some research online you will almost always read that the beneficial nutrients in juice are dissipated after just a few hours and that juice is best when consumed within the first 24 hours.  While this is true... juice does in fact have the most nutrient value within the first day, you can still drink juice after the first 24 hours and get some of the benefits... you just have to store it the proper way!


Tips for Longer Lasting Juice 


  1. NEVER leave juice unopened (i.e in a cup with no lid)  The more air that hits the juice, the more the nutrient value drops. You should never allow your juice to become warm. 
  2. Never leave at room temperature.  Juice stays fresh longer when cold.  I just recently bought an Igloo cooler back pack that I take with me EVERYWHERE.  I have re-freezable ice cubes that I throw in my backpack every morning along with jars of juice and I take that baby with me in the car, to work, to the gym... literally everywhere.  It keeps my juice ice cold and it helps me stay on track with eating healthy all day.

  3. Pour juice you don't plan on drinking right away in an airtight sealed container.  I like to use Mason Jars for several different reasons.  They are the best airtight sealed jars I've used, they are portable, easy to clean, and I have yet to break one... which is pretty amazing for me.  I have dropped one on concrete and it didn't break.. pretty impressive if you ask me! 
  4.  Add extra lemon juice to preserve juice.  
  5. Place your produce in the fridge.  Using fruit that is already cold will significantly help keep your juice fresh for a longer time period.  
  6. Freeze your juice for long term storage.  If you know that you aren't going to be drinking the juice you made for several days, you can freeze it and it will stay good until you are ready to defrost it.  You can also do this so your juice will stay cold throughout the day, usually by lunch time your juice will be ready to drink.

***WARNING***

When your juice starts to change in color, smell, and taste... It's starting to go bad! I have personally stored juice up to 5 days and have not had any problems.  With that being said, a lot of juicing is trial and error.  Watermelon for example goes bad within a day and I have never been able to drink it after the first 12 hours.  So just be cautious when storing juice! 


With this week being the 1st week of June I just wanted to encourage you all to make the most out of your summer!  Make it your healthiest summer yet... You deserve to have the body you've always dreamed of! I know earlier I talked about being busy which most of us are but your first appointment of the day should always be with yourself.  It takes 4 weeks for you to start seeing changes in your body, it takes 8 weeks for friends and family to start seeing changes, and it takes 12 weeks for the rest of the world.  Once you start seeing results it  becomes an addiction! 

I received these pictures last week from two people who have started juicing since I started my blog and was completely inspired!  I am so glad that I can be a small part of other people's journey!


And here's a little transformation picture of my own! 


Have a blessed week everyone! Much love to you all! If you post a picture of your juice, tag me! I love seeing all the photos!


#Sparkingfromtheinsideout

XoXo,
Ashley

For Daily Tips and Recipes follow me on: 

Instagram: ashleynicolemora1 
Twitter: MissAshleyMoora 


Wednesday, May 14, 2014

Juicing vs Blending


 Juicing is still a new concept for a lot of us therefore, I thought this week I would write about what juicing really is and how it’s different from blending. People tell me all time, “I just started juicing this weekend and I love my Nutribullet!” Although I too love my Nutribullet, using such like products is not considered to be “juicing” So this blog will be entirely dedicated to breaking down the difference between juicing and blending.


What is a juicer?

The sole purpose of a juicer is to extract the water and nutrients from fruits and vegetables. The produce will be fed through a strainer, which extracts all the liquid. Once the juicing process is done, you’re left with a liquid version of all your fruits and veggies making it a lot easier to get your daily dose of nutrients. (Plus, it’s a lot easier to down a quick glass of veggies rather than trying to sit down and eat an entire plate full of vegetables!)  Juicing fruits and veggies provides us with a hefty dose of antioxidants, vitamins, and minerals that immediately nourish our cells.  When you are juicing your final product should be 100% liquid with no pulp. 

Here is a list of Juicers that I recommend.
(I personally use the Breville Juice Fountain)

The Breville Juice Fountain Mulit-Speed $199.99 at Bed Bath and Beyond (make sure and use the 20% off coupon)


The Jack Lalane $99.00 at Bed Bath and Beyond (make sure and use the 20% off coupon)


The Juice Bullet by Magic Bullet $79.00 at Target 


The Black and Decker $31.43 at Wal-Mart 


*** All of these juicers can also be found on amazon and craigslist! 


What is a blender?

Everyone always asks me about the Nutribullet and the Ninja.  Both the Nutribullet and the Ninja are smoothie makers.  What goes into them is exactly what comes out. There is no extracting involved. The main difference between a blender and juicer is the final product.  The texture and taste of a juice and smoothie are completely different. I've tried the same recipe in both a blender and a juicer and they tasted completely different. With a smoothie you are going to be getting more fiber because all of the pulp is left in the drink. 


So which is better….Juicing or Blending?

         Although they are different, the answer is both! 


 Juicing Benefits:
·      No Digestion needed (it’s important to give your digestive system a break every now and then)
·      Disregards indigestible ingredients
·      Makes nutrients more readily available to the body in larger quantities
·      100% Liquid (zero pulp)
·      Nutrients and Vitamins directly go to the blood stream
·      Your body doesn’t need to use a lot of energy to process juice which leaves you feeling more energized
·      Benefits those with weak digestive track 

Blending Benefits:
·      Retains Fiber
·      You can use frozen ingredients
·      More filling than juice
·      Fiber helps balance blood sugar levels


CAUTION: 
All of the recipes on my blog are designed for juicers not blenders.  If you try to duplicate a recipe in your blender, it will probably overflow! You will have to cut the ingredients WAY down in a blender and the taste for my recipes will be completely different as a smoothie because they were intended to be made as juices. 


I hope this helped! If you have any questions feel free to leave a comment! 

XoXo, 
Ashley

For Daily Tips and Recipes follow me on: 

Instagram: ashleynicolemora1 

Twitter: MissAshleyMoora 


Wednesday, May 7, 2014

How To Get The Most Out Of Juicing


 This is a picture of a Juice Cleanse I did!


 Juicing is a convenient way to get your daily dose of fruit and vegetables.  A fresh juice is basically just a concentrated dose of vitamins, minerals, enzymes, and antioxidants that is shot immediately into our bloodstream so we can absorb all of the nutrients.  There are so many wonderful benefits that come along with juicing but it can be expensive. So I thought I would share with you some of the ways I get the most out of juicing. 

    The farmers market is the cheapest place to purchase produce and it’s local which is a plus.  I haven’t priced every single thing out but comparing complete trips to the grocery store, the farmers market was by far my cheapest trip.  I also enjoyed shopping at the farmers market because I wasn’t tempted by the cookie or chip aisle like I always am at the grocery store.  There was ONLY fruits and vegetables so I was able to go in, get what I needed, and get out!


 Fruits and Vegetables with a high water content will ALWAYS juice the best! For example apples, celery, and cucumbers are going to produce a lot more juice than kale or spinach.  So that is something to keep in mind when you are doing your grocery shopping.


There is a specific order in which you are able to get more juice when juicing! I have found this order of operation to be extremely beneficial, so I thought I would share :)

1. ALWAYS start with your leafy ingredients first! Spinach, Kale, Mint Leaves, Parsley, Rosemary, Wheatgrass, Cilantro.  These ingredients are going to produce a small amount of juice when you send it thru your juicer.  They are very beneficial but their water content is low.  You never want to save these types of ingredients for the end because they need some help getting pushed out.


2.  Second, if a recipe calls for ginger root, I will send that next.  Ginger is another thing you never want to save until the end to add in.  If a recipe doesn’t call for ginger root, I’ll do things like Jalapenos, lemons, oranges, grapefruit, beets, carrots, bell peppers… pretty much anything that is a little softer than an apple. 


3.  Last but not least you always want to save your hardest produce items for last… and by that I mean things like apples, celery, cucumbers, onions etc.  Saving these things to juice at the end cleans out whatever is hanging out in your strainer, therefore pushing out a little more kale or whatever wasn't fully executed on its own.  


Basically just remember when juicing,  go from softest to hardest!


I hope this was helpful to some of you who have recently started juicing! 

Happy Mothers Day to all the Mommas out there who read my blog! I so appreciate each and every one of you!  Have a blessed week everyone! 

XoXo,
Ashley 

For Daily Tips and Recipes follow me on: 

Instagram: ashleynicolemora1 
Twitter: MissAshleyMoora 
Me and my mom shopping in Florida last year!


 p.s Thank you to those of you who are taking time out of your busy schedule to read my blog! It means the world to me!


Monday, April 28, 2014

How to Avoid Cheating pt. 1


How To Avoid Cheating -Part 1


The two most important things we can do to stay on track with our diet are to PLAN & PREP.  Did you know that almost all “diets” work?  But only if we stay on them… which is the hardest part for everybody!  The only way to avoid falling off the wagon is to constantly stay prepared, never allow yourself to be confused about what you are eating, and having a healthy snack around you AT ALL TIMES because inevitably there will come a time when you need something ASAP and it’s in these moments of weakness where we usually give in and reach for something we end up regretting later on.  Ditch the fast food, packaged food, and over processed foods! 

 One of the best ways to always stay prepared is to keep a “snack pack” in your car at all times.  I keep my snack pack stocked with a bunch of clean snacks that I wont feel guilty eating.  I started doing this because:

1.     Almost weekly, there would be a day that I ended up not packing my lunch, forgetting to pack snacks, or I would be out and about longer than expected etc. 
2.     I typically always have access to my car, so it’s a great place to keep some healthy snacks.
3.     I like to save my cheats for the weekend when I actually have plans to eat out. 

CLEAN SNACK PACK LIST
(This list can also double as a road trip packing list and it is Paleo friendly)

1.     Lara Bars (avoid the ones with chocolate chips when storing in your car)
2.     Mixed Nuts
3.     Unsweetened Dried Fruit/ Freeze dried fruit
4.     Clean Turkey Jerky or Beef Jerky (Grass Fed, Minimal Ingredients)
5.     Nut Thins
6.     Almond Butter
7.     Water Bottle 


 I like these Coconut chips a lot but I don't always keep them in my car!


If at any time you do end up stopping for food, here are a few things to always remember.

1.     Be Picky
2.     Drink a lot of water.  A lot of the time when we think we’re hungry we are actually dehydrated. 
3.     Move on.  Every now and then we all have to do it!


 XoXo, 
Ashley Nicole 

For Daily Tips and Recipes follow me on: 

Instagram: ashleynicolemora1 
Twitter: MissAshleyMoora